Contact
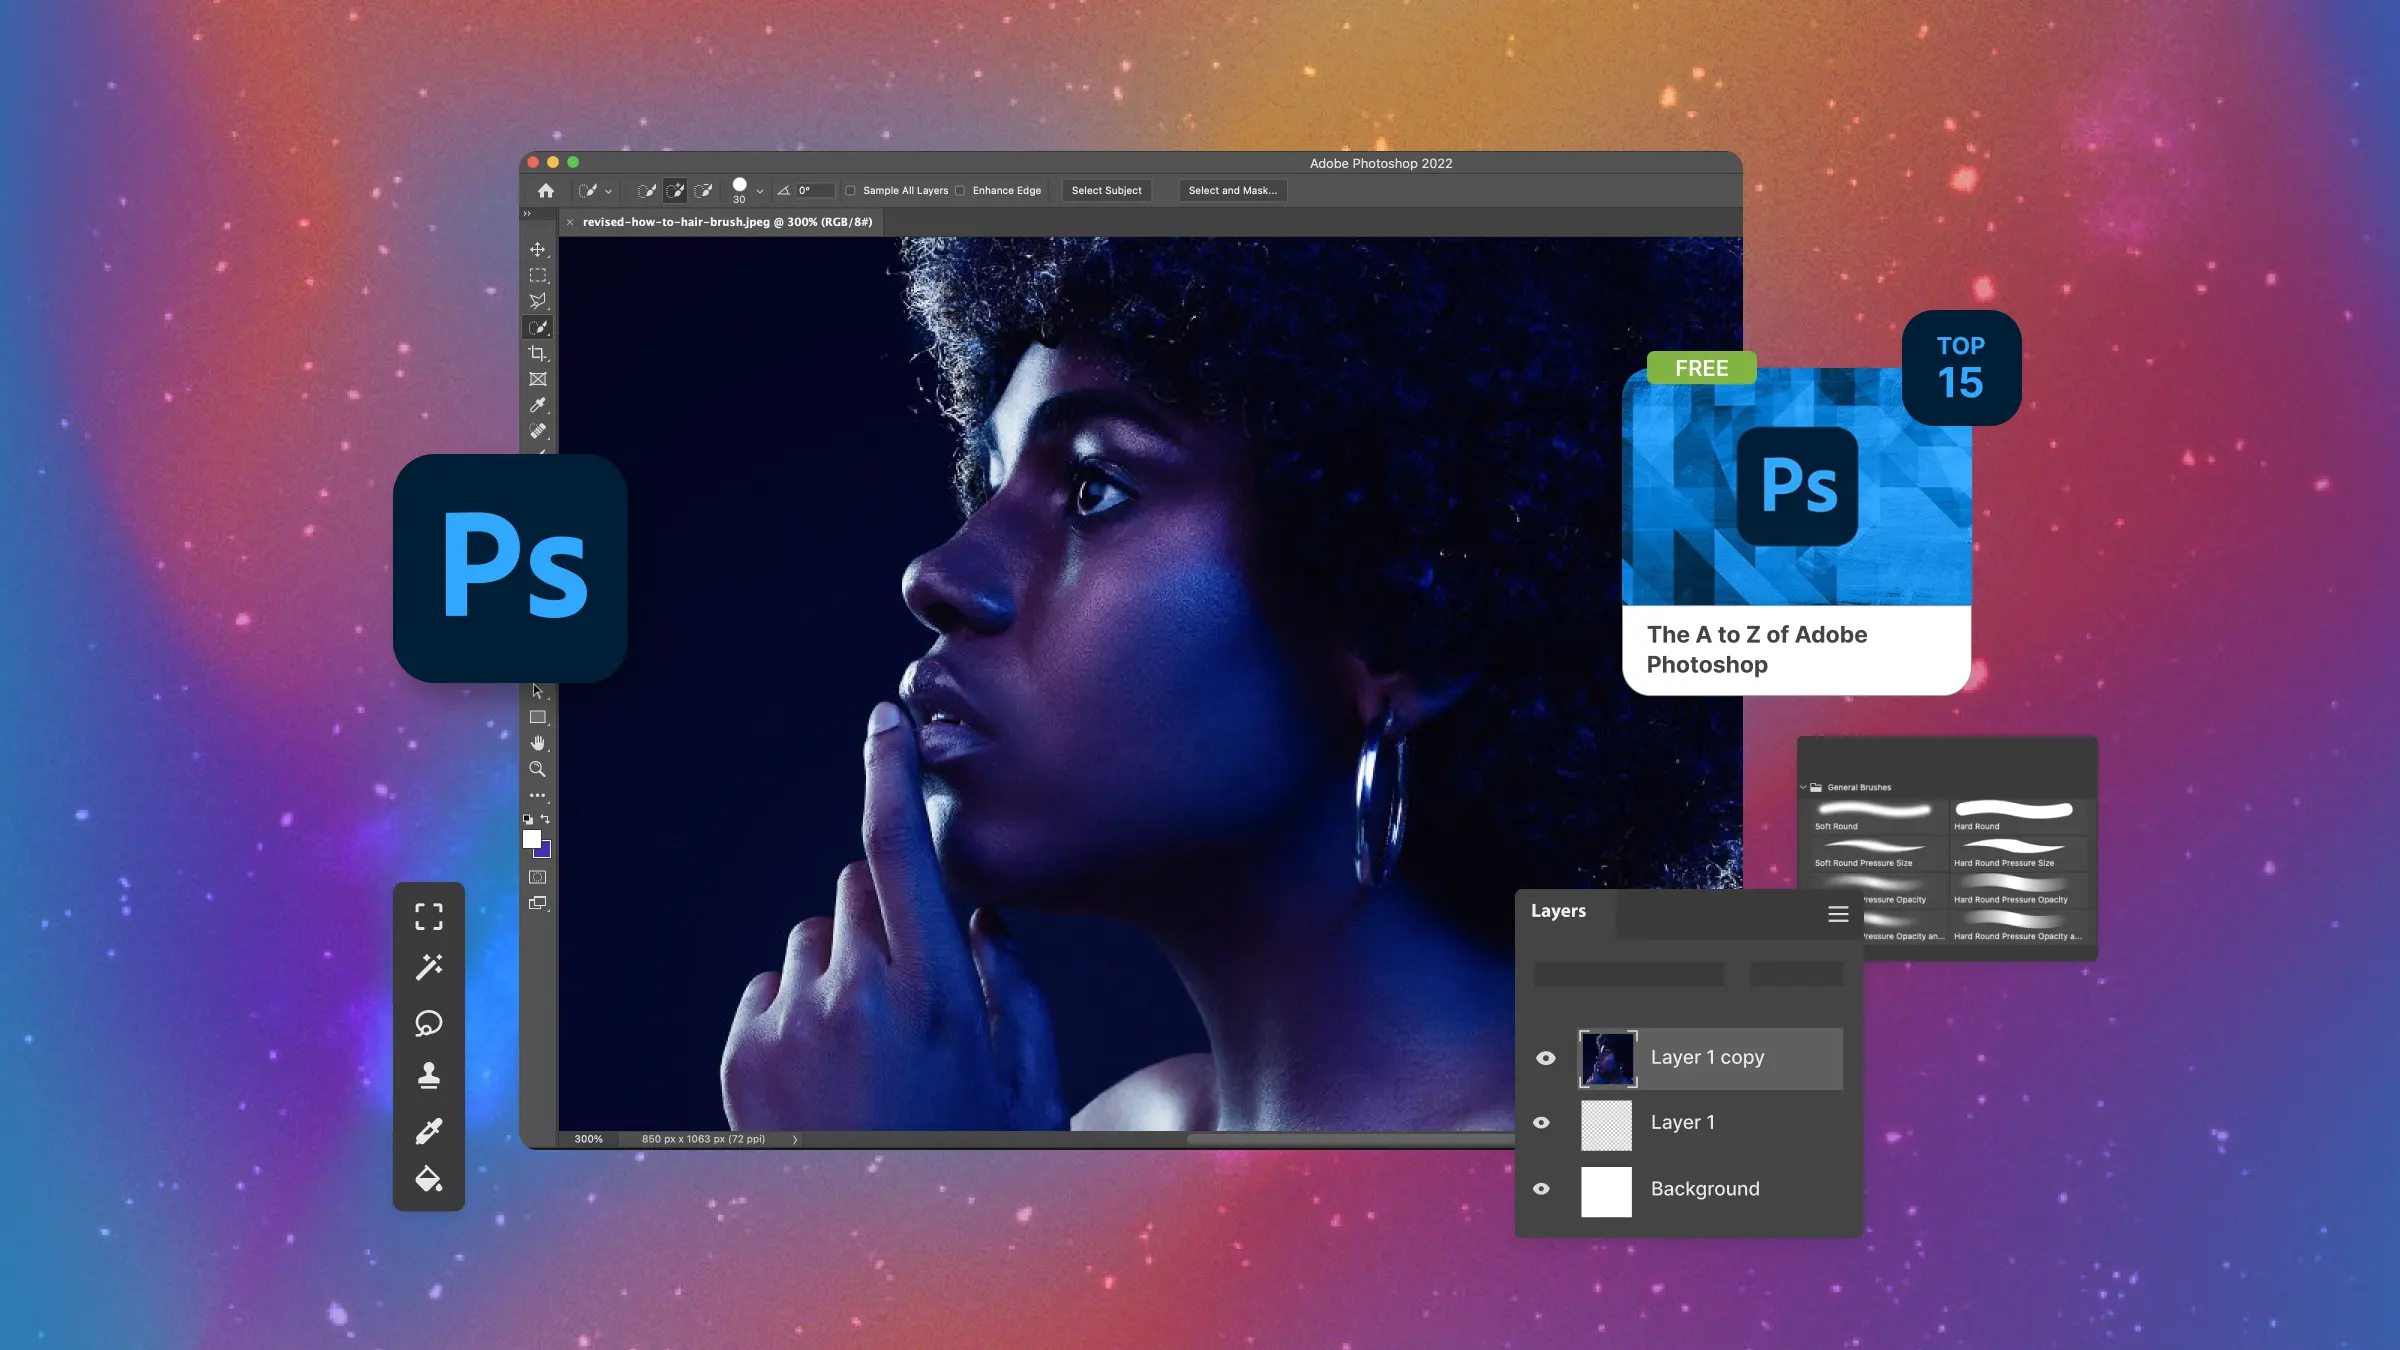
Adobe Photoshop is a powerful digital art tool that provides a wide range of drawing tools and features to unleash your creativity. Whether you’re a beginner or an experienced artist, Photoshop offers a plethora of options to create stunning artworks. In this beginner’s guide, we will walk you through the process of using Photoshop’s drawing tools, covering important topics such as creating different art styles, working with layers, applying filters, and utilizing other creative tools.
Getting Started with Photoshop’s Drawing Tools
Before diving into the various drawing tools and techniques, it’s essential to familiarize yourself with the Photoshop interface and basic functions.
- Install and launch Photoshop: If you haven’t already, download and install Adobe Photoshop on your computer. Launch the application and create a new document by clicking on “File” > “New” or using the keyboard shortcut Ctrl+N (Windows) or Command+N (Mac).
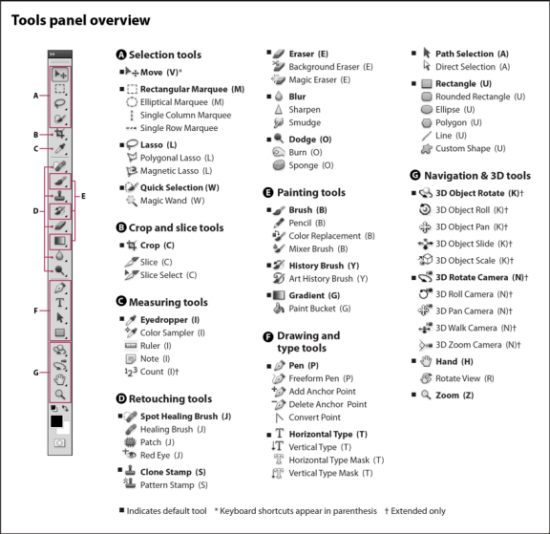
- Understanding the Photoshop interface: The Photoshop interface consists of various panels, menus, and tools. The most commonly used panels for drawing are the “Layers” panel and the “Brushes” panel. Take a moment to explore and familiarize yourself with these panels and their functions. You can find them by navigating to “Window” > “Layers” and “Window” > “Brushes.”
- Selecting a brush: Selecting the right brush is crucial for achieving the desired effect in your artwork. In the Brushes panel, you’ll find a wide variety of preloaded brushes. Experiment with different brushes by clicking on them and observing the preview in the panel. You can also adjust the brush size and hardness using the sliders.
Creating Different Art Styles in Photoshop

Photoshop offers numerous tools and techniques to create different art styles, ranging from realistic illustrations to abstract artworks. Let’s explore some popular art styles and how to achieve them using Photoshop’s drawing tools.
- Realistic digital painting: To create a realistic digital painting in Photoshop, start by sketching the basic outline of your subject using a pencil brush. Once the sketch is complete, switch to a brush with softer edges and gradually build up the colors and details. Use the brush opacity and flow settings to achieve smooth transitions and blend colors. Experiment with different brush sizes, opacities, and blending modes to add depth and realism to your painting.
- Comic book-style illustration: To create a comic book-style illustration, start with a clean line art drawing. Use the Pen tool or Brush tool with a hard edge to create bold, black outlines. Once the outlines are complete, add flat colors to different areas using the Paint Bucket tool or by creating new layers beneath the line art layer. Then, use the Brush tool with various opacities and blending modes to add shading, highlights, and textures. Experiment with halftone patterns and speech bubbles to add a classic comic book feel.
- Abstract digital art: Photoshop’s drawing tools are also great for creating abstract digital art. Start by creating a new document and experimenting with different brushes, colors, and strokes. Use the Brush tool with dynamic brush settings to create expressive and organic shapes. Try experimenting with blending modes, layer opacity, and layer masks to add depth and complexity to your artwork. Don’t be afraid to play with colors, textures, and filters to achieve unique and visually striking results.
Working with Layers and Blending Modes
Layers are an essential feature in Photoshop that allow you to work on different elements of your artwork independently. Understanding how to use layers effectively will give you more control and flexibility in your creative process.
- Creating and organizing layers: To create a new layer, click on the “New Layer” button at the bottom of the Layers panel or use the keyboard shortcut Shift+Ctrl+N (Windows) or Shift+Command+N (Mac). You can rename layers by double-clicking on their names and organize them by dragging and rearranging them in the Layers panel.
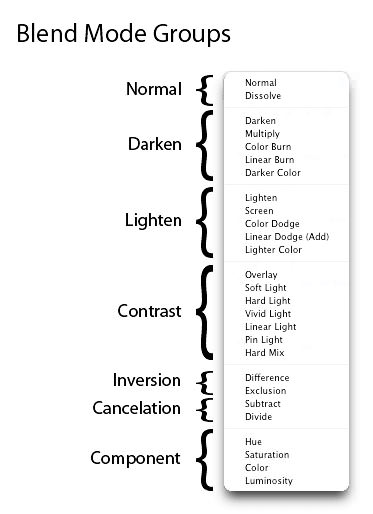
- Adjusting layer opacity and blending modes: Adjusting the opacity of a layer allows you to control its transparency. You can change the opacity by adjusting the Opacity slider in the Layers panel. Blending modes, on the other hand, determine how the pixels of one layer interact with the layers beneath it. Experiment with different blending modes to achieve interesting effects. You can find the blending mode options in the drop-down menu at the top of the Layers panel.
- Using layer masks: Layer masks are powerful tools that allow you to hide or reveal parts of a layer without permanently erasing or altering the original pixels. To add a layer mask, select the layer you want to mask and click on the “Add Layer Mask” button at the bottom of the Layers panel. Use the Brush tool with black and white colors to paint on the layer mask, revealing or hiding portions of the layer.
Applying Filters and Other Creative Tools

Photoshop offers a wide range of filters and additional creative tools that can enhance your artwork and give it a unique look. Let’scontinue exploring these features.
- Applying filters: Filters in Photoshop can dramatically transform your artwork by applying various effects and adjustments. To apply a filter, select the layer you want to apply it to and navigate to “Filter” > “Filter Gallery” or choose from the available filter options in the “Filter” menu. Experiment with different filters such as Blur, Distort, and Stylize to see how they impact your artwork. You can adjust the filter settings to fine-tune the effect.
- Using adjustment layers: Adjustment layers are non-destructive tools that allow you to make changes to your artwork without permanently altering the original pixels. They provide options for adjusting brightness, contrast, colors, and more. To add an adjustment layer, click on the “Adjustment Layer” button at the bottom of the Layers panel and choose the desired adjustment option. Adjust the settings in the adjustment layer properties panel to achieve the desired effect.
- Utilizing creative brushes and custom shapes: Photoshop provides a vast collection of creative brushes and custom shapes that can add interesting elements to your artwork. In the Brushes panel, you can find brushes categorized under different themes such as artistic, natural, and special effects. Experiment with different brushes to create unique textures and patterns. Similarly, the Custom Shape tool allows you to add predefined shapes to your artwork. Select the tool, choose a shape from the Shape options bar, and click and drag on your canvas to add the shape.
- Adding text and typography: Photoshop offers powerful text tools that allow you to add and manipulate text in your artwork. Select the Type tool from the toolbar, click on your canvas, and start typing. You can adjust the font, size, color, and other text properties using the options in the Character panel. Experiment with different fonts and text effects to complement your artwork. You can also apply layer styles and blending modes to the text layer for additional creativity.
Remember to experiment, practice, and have fun with Photoshop’s drawing tools. The more you explore and play around, the better you’ll become at utilizing its features to unlock your creativity. Don’t be afraid to make mistakes and try new techniques. With time and practice, you’ll develop your own unique style and create amazing artworks using Adobe Photoshop.